
The original motorcycle seat cover might not be as appealing, especially if you love things customized. Besides, the stationary seat cover may not be as attractive or long-lasting not to change at some point.
No matter what’s the reason, a vinyl seat cover can be a great material to go with. But vinyl is not as easy as working with leather, it needs a set of skills and know-how to get the job done.
How to cover a motorcycle seat with vinyl then?
You’ll have to measure both the seat and the top cover and cut the cover in size. After that, reshape or customize the seat, and put the new cover on.
Let’s cover the process in detail and get you through the process.
What Is the Best Material for a Motorcycle Seat?
Foam or Gel motorcycle seat– there’s always such confusion when you are up to buying a new one. It goes the same for the cover on the seat. Primarily, the seat material depends on how you will be using it.
First off, will it be just for daily cruising or carrying loads for distant places? When you make up your mind on the driving needs, choosing the material is much easier.
Hence, the gel motorcycle seat is only for those who need to stay on it for a spontaneous ride. The gel seats have soft gels that give proper support for the body and weight for a long time. Otherwise, a foam motorcycle seat will be a decent choice for regular use with utmost comfort.
Now, what about the external covering? We will prefer two materials for it- leather and vinyl, of all. The reasons behind it are pretty simple. These two types of cover are most durable in any weather conditions and ergonomic designs. Also, they protect the seat from direct sunlight and keep it sustainable too.
How to Cover A Motorcycle Seat with Vinyl?
Changing the outer cover of the seat is the most basic DIY work for the bikers. This method is applicable for any type of seat from normal ones to sophisticated ones like seat for heritage softail classic. The reupholstering process is pretty simple if you know about the tools and steps precisely.
Here are the tools needed-
- Marine-grade vinyl cover.
- Staple gun.
- Heat gun.
Here’s The Whole Process,
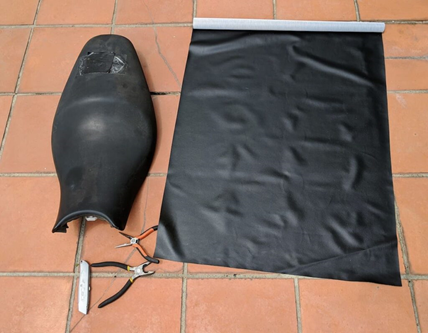
Remove The Seat
Read the bike manual first and locate all the screws and nuts that hold the seat. It’s not a complicated task; you can do it by yourself, inspecting the hidden areas. It will take a bit of time for a touring bike or cross bike for the mopped anchor.
But don’t rush or push on the parts to remove the seat; otherwise, they can be damaged. After removing the seat, put it on a table and rotate it. Here, you will see the old staples under the seat.
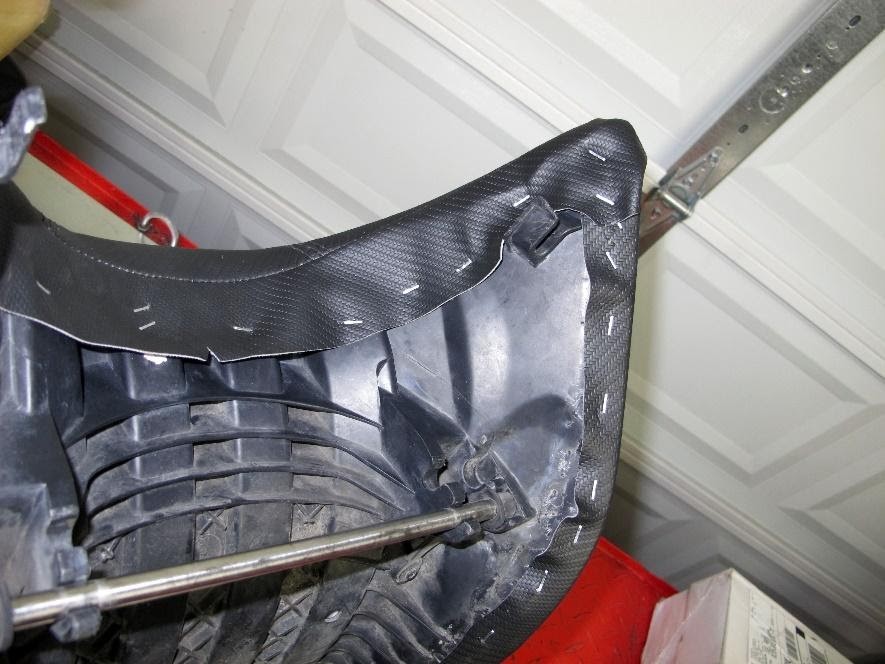
Remove The Old Staples
Grab the seat vertically on the table and figure the staple size. It’s important because you have to be accurate about their size to put the new ones. Then, take off the old staples with plies.
Don’t rush on removing the old staples, as it can put a scratch under the seat. When all the staples are off, the fabric will be released. After that, please put it on the table keeping and configure the size of the seat with a ruler.
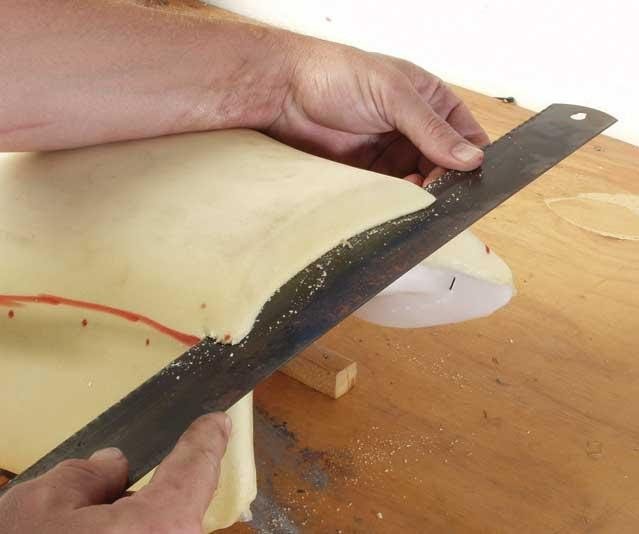
Covering With New Vinyl
You have to cover the whole surface of the seating area. So, cut the vinyl cover, keeping at least 10cm more extensive than the size for starching later on. Have a double check by covering the area with the vinyl.
Now, grab your air stapler or pneumatic stapler to start the staple work. Pick a side and begin stapling on the last stapled places. Therefore, you have to press the stapler with enough force to get the depth.
Staple and Stretch
If you have any elevated space on the seat, you have to begin with the lower area. It will fasten the end smoothly. After the first staple, you have to stretch the cover a little to have the finest finishing.
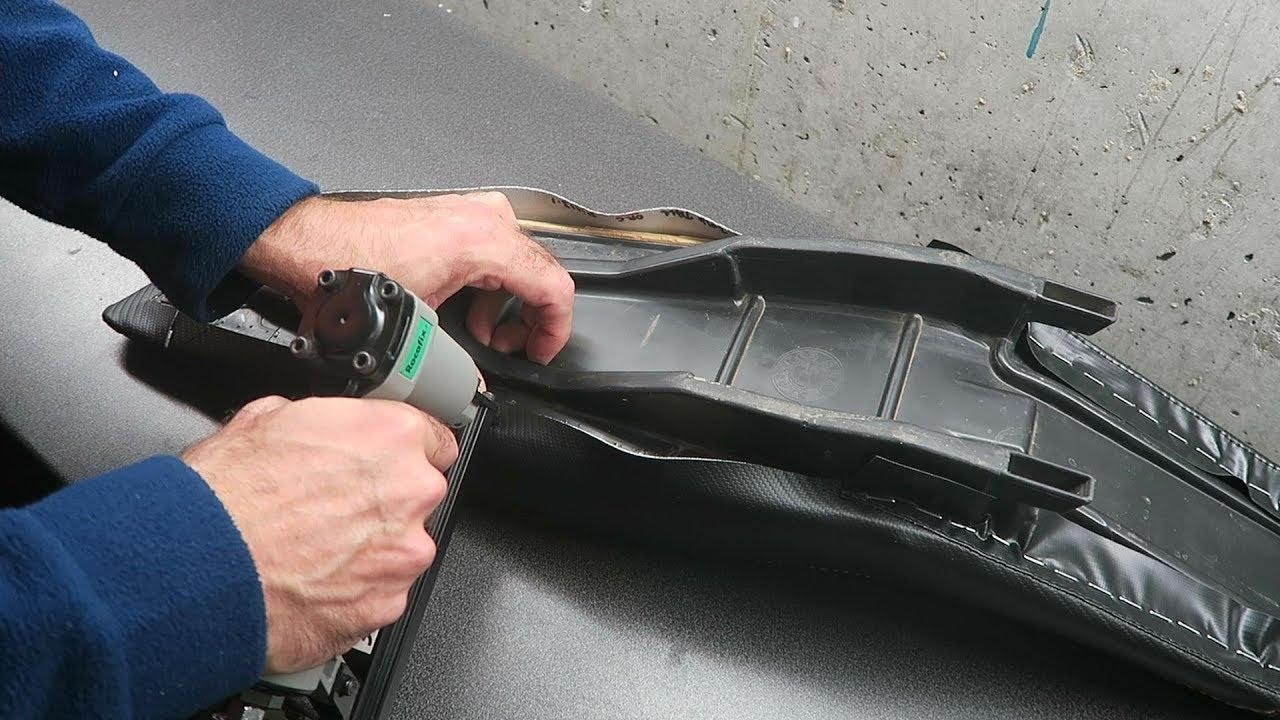
You have to do it after every stapling and keep the cover attached to the seat. Then use the heat gun for the ridge area. It will make perfect stretch on the seat without any use of gel.
Finish It Off
After completing one side of the cover, check if the area is stretched precisely. Then go for the other side and try stretching after the stapling. Always be alert about wrinkles, and if you find any, pull off the staple and stretch it with a heat gun.
Do the same to the side areas and under the seat. When you complete the whole staple process, have a check with your hand without any pressure. If you feel zero creases, the covering job is completed successfully. You can warm the side areas again with the gun for an acceptable seat frame.
Final Verdict
Most of the bikers prefer vinyl on the seat for its durability at low maintenance in any weather. But the cover can get wrinkles over time if you don’t cover the surface accurately.
In that case, as you now know how to cover a motorcycle seat with vinyl, you have just the skills to do the job. However, the durability can get affected and can have worn-out issues if not done properly.
So, follow the steps properly, and be sure to staple the vinyl to the seat well.