
Your motorcycle battery is one of the most important components in your bike. This little integral device controls the ignition, lights, signals, and other accessories in the dashboard. But what happens if the battery drains off? Reviving a dead motorcycle battery should not be a serious challenge for as this page on how to revive a dead motorcycle battery answers all your questions.
The right way to revive a dead motorcycle battery is to recharge the battery. There are steps and methods you can choose to recharge the dead battery. Some methods you can do yourself while some require experts’ service. So, let’s discuss each of the methods without further ado.
Can You Revive A Dead Motorcycle Battery?
Yes, you can revive a dead motorcycle battery if you follow some simple steps and a few safety measures. Also, doing the right thing will help with reviving the battery. Therefore, it is a task that some experienced auto service agents should only do.
Whether during joyriding or trips, the fear of that dead motorcycle battery is always a possibility. Batteries die for many reasons, and sometimes regardless of what you did to maintain it, you still may need a new one.
However, instead of jumping to the conclusion that the battery is dead and buying a new one, you should try reviving the battery charge. Throwing the bike battery away or abandoning it might not always be the right thing to do.
What Tools Do You Need To Revive A Dead Motorcycle Battery?
The best tool for reviving a dead motorcycle battery is a smart charger. A smart charger is a maintenance charger that uses algorithms to charge quickly without overcharging the battery. Just connect the charger, turn it on and wait for it to do its work.
But there are other methods too. And below is an overall list of things you may need to revive a dead motorcycle battery.
- 12-volt battery charger
- Mixing bottle/Flask or Pan 2L
- Insulated wrenches
- Safety gloves and goggles
- Warm Distilled water 1L
- Multi-meter and jumper cables
- Screwdrivers
- Plastic Bucket
- Baking Soda (16oz)
- Battery load tester
- Epsom salt 0.5 (16oz)
- Plastic Funnel or syringe
- Battery Charger (Smart chargers are best)
- Battery hydrometer
So, those are the essential tools that you can use to revive your dead motorcycle battery. Before we move into the revival process, let me make clear one thing- allow an expert to do the recharging for you if you have zero idea about motorcycle parts.
How To Revive A Dead Motorcycle Battery?
Now that you know the essential tools for reviving your battery, here are ways you can revive the dead battery.
The following steps will only work for a dead lead-acid motorcycle battery.
1. Remove The Battery From The Motorcycle
The first thing you have to do with reviving a dead battery is to remove the battery from your motorcycle. You do not have to wait for it to cool down since it has been dead for a while.
You can remove the battery from your motorcycle using a screwdriver or the insulated wrench. Start by removing the negative cable and then to the battery’s positive cable. If you notice any form of corrosion on the ports of the battery, then it’s best to clean the mess using steel wool and baking soda.
The time to clean the ports depends on how bad the corrosion is. But you must clean it to proceed to the next step.
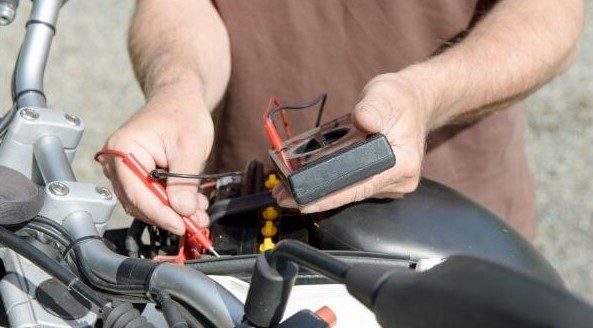
2. Check The Battery Voltage
After you have cleared the ports of the battery, you need to use your voltmeter to take the voltage reading. Using your multimeter in the voltage mode, place the red probe on the positive port and the negative, which is the black probe on the negative port of the battery.
You should get the reading for the voltage on your meter if you have it all done properly. The reading you get is called the open-circuit voltage because nothing is connected to the battery.
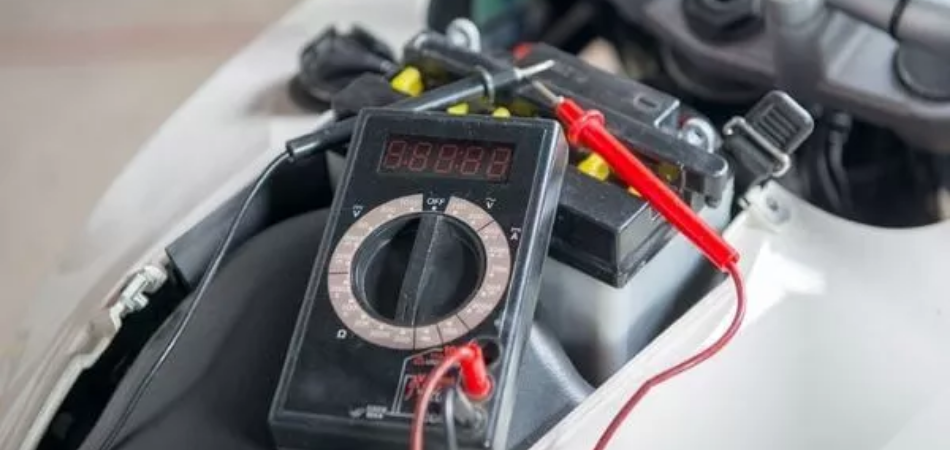
If your voltage reading is 12v and above, it shows that the battery is still good.
If the reading falls between zero to 7 voltages, it is an indication that the battery is bad and should be replaced.
3. Confirm The Cell Health And Voltage
Next, you need to check the cell voltage of the battery using the multimeter. The right way to measure the specific gravity of the electrolyte in the battery is through a hydrometer.
You can only use this in the absence of a working digital multimeter. But if you have a multimeter, it is the best tool to use for the measurement.
To do the measurement, first expose the caps of the cell, and the right way to do that is by removing the plastic cover right on top of the battery. Then you can go ahead with placing your negative probe of the multimeter on the battery’s negative terminal and then dip the end of your red probe into the cells.
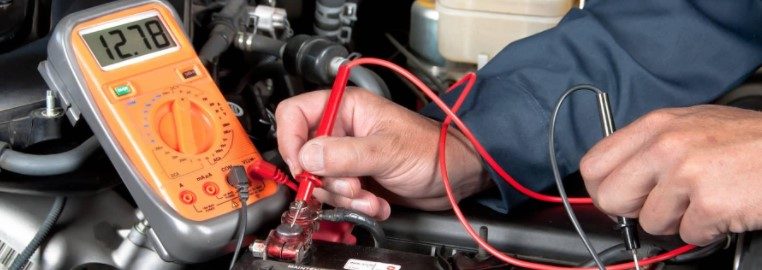
You should then see the reading on the multimeter in the voltage mode. If the reading of the cell electrolyte is over 12v, then the chances that the cells are good are high, while any reading below 1V shows the battery might be so bad and need replacement.
4. Empty The Cells And Refill With Epsom Salt
To do this task, make sure you’re wearing gloves because Epsom salt is harmful for skin. You should carefully get rid of the cells into any available plastic bucket. For this to happen, remove the cell caps and then bend the battery to let the liquid into a bucket.
Once you have completely emptied the liquid inside the battery, add baking soda into the bucket. This will neutralize the acid. Get your Epsom salt and add it to a 1 quart of boiled distilled water. Stir the mixture until the salt gets completely dissolves in the liquid.
Leave the solution to cool and then fill up each battery cell with the solution using a syringe until each cell gets to its maximum limit.
5. Recharge The Battery
After refilling the cell electrolyte, the next step is to recharge the battery. You can do this by using the smart charger. Mind that you have to charge a dead battery for up to 24 hours to get it back to its best condition.
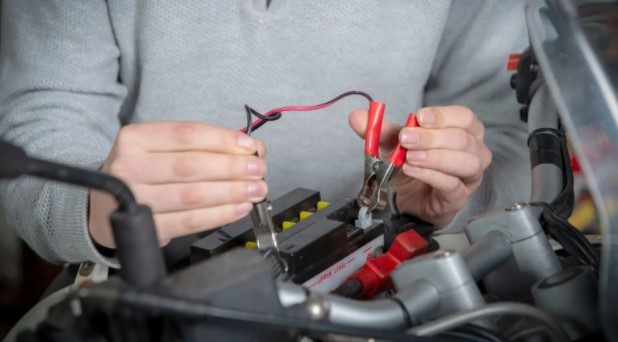
When charging the battery, you should leave the cell caps off so that there will be no build-up of pressure that can cause safety issues.
Just follow the instructions on using the smart charger depending on the type and model you get to charge the battery.
6. Take the Voltage Reading Again
After 24 hours of charging the battery, you should take another open test. Use the multimeter to take the voltage reading. If the battery gives a voltage between 12 V and above, it is fully charged.
7. Reinsert Your Battery Into The Motorcycle
You can go through a load test if you can, but as long as you can confirm the battery is fully charged, you just need to re-install it to your motorcycle.
Conclusion
It takes a lot of trial-and-error to learn how to revive a dead battery. I have been there, and I know how disappointing it can be to start a motorcycle that refuses to start. But you should not lose your peace over a dead battery, even though the situation can be unpleasant.
Sometimes you can run the bike even without going through all this. For instance, some Harley motorcycles can start even with a dead battery. However, proper maintenance can help you in prolonging the lifespan of the battery. So that’s what you should focus on.